

Well, today I first tried some Evo-Stick Metal Epoxy Putty, which is already well on the way to setting by the time you have kneaded it to the correct consistency, to build up the hole in the Rod End. That just fell off the metal (that had been thoroughly de-greased before applying) as I pushed the bush in. I next tried something my dad mentioned he had in the cupboard of many glues, adhesives and caulk, a product called 'Supafix APX4' which comprises two bottles of what I can only presume is an iso-cyanate (smelt like Superglue to me anyway) and then a bottle of grey and a bottle of black powder. The idea is that it is a super-fast setting (7 seconds they claim) metal crack filling adhesive, you first pour some of the appropriate coloured powder (I'm guessing the grey is aluminium based and the black stainless steel based) into the crack you want to fill then you dribble on the 'activator' (Superglue) which causes a fairly hot exothermic reaction with the powder before setting pretty hard. I'd say give it 5 minutes before filing off the excess. It's certainly been more successful than the putty, and withstood the ram hanging off it while I worked on the inner end (which was also worn but not as badly). If it holds up then win! If it doesn't the Ram will have to come off for the holes to be bored out and a custom bush being machined up to fit.
I may yet still need a better condition steering Ram as there is a fair bit of damage on the plated shaft and neither the Epoxy putty nor the APX4 would bond to it despite my best efforts.
1987 JCB 3CX Sitemaster 2WD
-
 Slooby
Topic author - Posts: 505
- Joined: Wed Aug 19, 2020 10:32 pm
- Real name: Tim
- Has thanked: 191 times
- Been thanked: 117 times
- Flag:

Re: 1987 JCB 3CX Sitemaster 2WD
CMN Stuff: MF65, Thwaites Nimline, JCB 3CX
Projects: S11a 88" V8 Hybrid, 2 x S111 109"s, Mk11 Mini, Harrison L5A
Ish projects: T25 Camper, ST675R
Just added: Alpine S5 & Bridgeport Mk2
Sorely Missed: Impreza, E39 M5
Projects: S11a 88" V8 Hybrid, 2 x S111 109"s, Mk11 Mini, Harrison L5A
Ish projects: T25 Camper, ST675R
Just added: Alpine S5 & Bridgeport Mk2
Sorely Missed: Impreza, E39 M5
-
gecko.cx
- Posts: 309
- Joined: Thu Jul 04, 2019 11:44 am
- Real name: ian
- Has thanked: 126 times
- Been thanked: 114 times
- Flag:

Re: 1987 JCB 3CX Sitemaster 2WD
You'll need a rigid drill press as a minimum or a mill to bore that back to round. A hone will give you a smooth surface, but it will chase the existing profile rather than bring it back to round.
The first ugly workaround I can think of (doesn't involve removing the cylinder) is it hold your 32mm bush (via a 25mm support) in a 4-jaw chuck slightly off centre and machine it oval - trying to match your worn profile (I said it was ugly!).
The first ugly workaround I can think of (doesn't involve removing the cylinder) is it hold your 32mm bush (via a 25mm support) in a 4-jaw chuck slightly off centre and machine it oval - trying to match your worn profile (I said it was ugly!).
-
Slooby
Topic author - Posts: 505
- Joined: Wed Aug 19, 2020 10:32 pm
- Real name: Tim
- Has thanked: 191 times
- Been thanked: 117 times
- Flag:
Re: 1987 JCB 3CX Sitemaster 2WD
gecko.cx wrote:You'll need a rigid drill press as a minimum or a mill to bore that back to round. A hone will give you a smooth surface, but it will chase the existing profile rather than bring it back to round.
The first ugly workaround I can think of (doesn't involve removing the cylinder) is it hold your 32mm bush (via a 25mm support) in a 4-jaw chuck slightly off centre and machine it oval - trying to match your worn profile (I said it was ugly!).
Lol
After spending most of the day with it yesterday I had reached a similar conclusion regarding taking the ram to a machine shop and doing the job properly, probably on a mill. I also need to get in some shims as there is a lot of wear on all the swivels in the steering
The pillar drill I have here is by no means up to the task, and I doubt either of my own ones are either
Looking at tge state of the ram shaft I think I better condition ram is going to be top of the list though, but I am not spending 300 quid on one of those, which seems to be the current rate that people want for used rams on ebay
CMN Stuff: MF65, Thwaites Nimline, JCB 3CX
Projects: S11a 88" V8 Hybrid, 2 x S111 109"s, Mk11 Mini, Harrison L5A
Ish projects: T25 Camper, ST675R
Just added: Alpine S5 & Bridgeport Mk2
Sorely Missed: Impreza, E39 M5
Projects: S11a 88" V8 Hybrid, 2 x S111 109"s, Mk11 Mini, Harrison L5A
Ish projects: T25 Camper, ST675R
Just added: Alpine S5 & Bridgeport Mk2
Sorely Missed: Impreza, E39 M5
-
Slooby
Topic author - Posts: 505
- Joined: Wed Aug 19, 2020 10:32 pm
- Real name: Tim
- Has thanked: 191 times
- Been thanked: 117 times
- Flag:
Re: 1987 JCB 3CX Sitemaster 2WD
Had a busy couple of days fixing some of the interior fittings and then getting them back into the cab along with the rest of the matting.
With the cab tub painted I got my hands on some Waxoyl and a Schutz gun to give the tub floor, the wheelarches, underneath where the cab bolts to the tub and then inside all the box sections of the cab a good coating. With that done I put the matting back in and got to refitting the steering column shroud and excavator arm console.
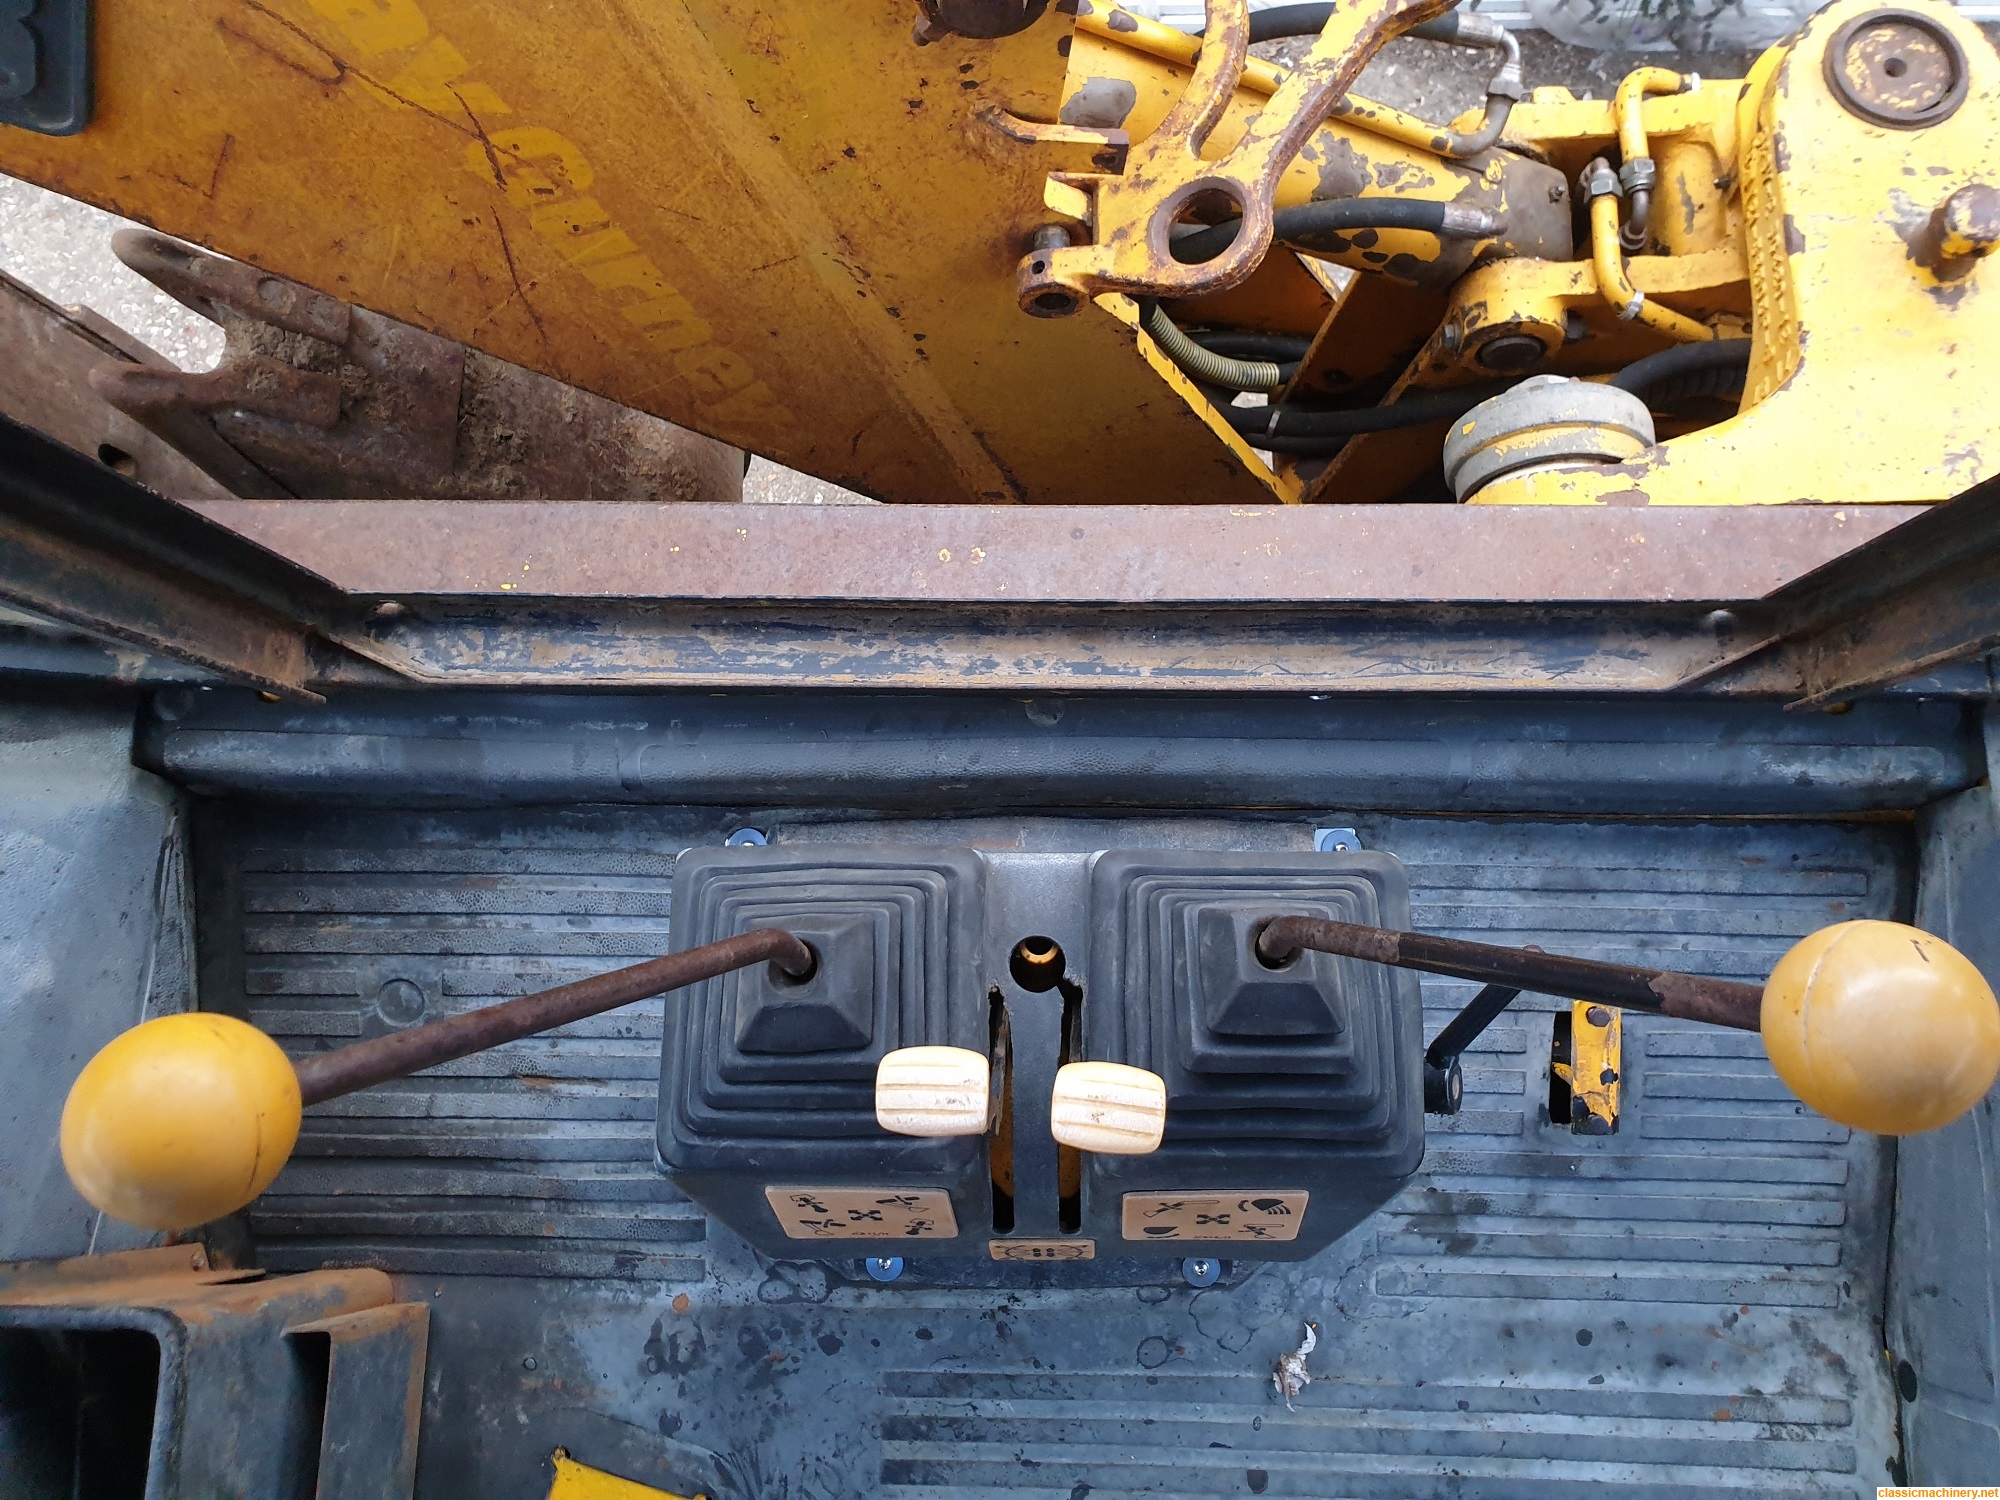
The back edge of the excavator arm console was missing the tabs for its fixings and what was left of the plastic had gone quite brittle in the sun, so I folded up a piece of 1mm thick aluminium to form a new mounting then using some pop rivets and CT1 adhesive (thought I'd give it a go as my dad and brother-in-law rave about the stuff) fixed it to the console. Seems to have done the trick, and having tapped the holes in the floor of the tub to M6x1 where it fits I've secured it down to the floor. Feels nice and rigid. Got to say the way the hydraulic lock operates is daft, using a piece of crimped on rubber hose to translate a rotation from nearly vertical to horizontal is pretty poor and it simply doesn't feel like it works that well. Maybe it with feel better when the system is pumping fluid round. Anyway, pics:
Repair to the excavator arm control console:
Floor mat, arch covers, bulkhead covers, cubby box, steering column shroud, excavator arm control console and handbrake all refitted:
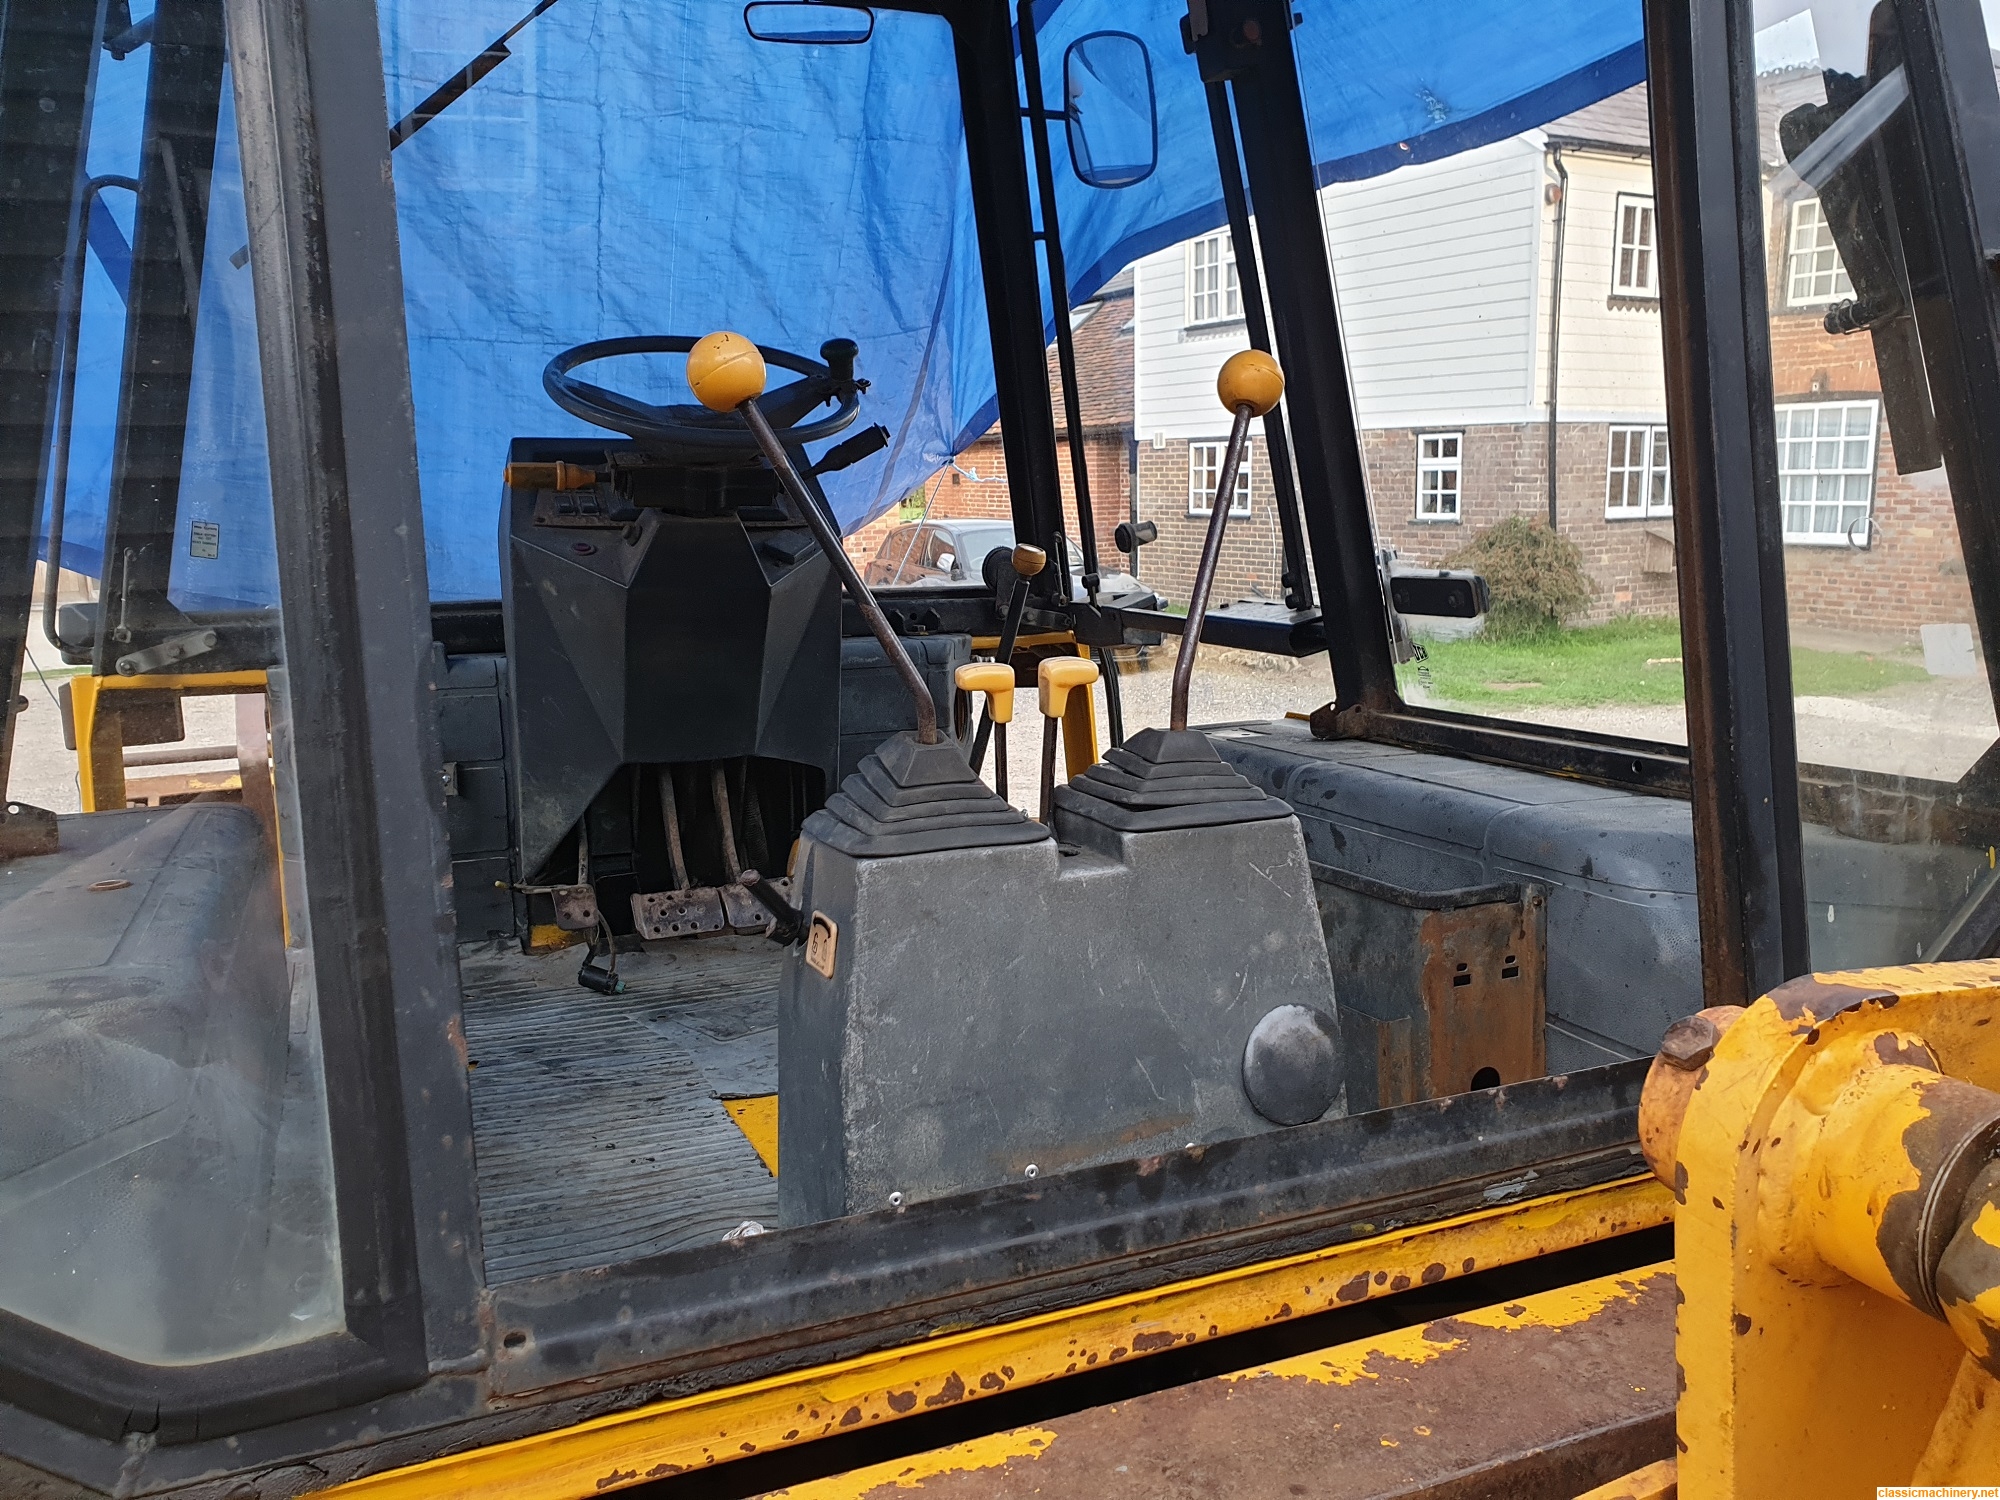
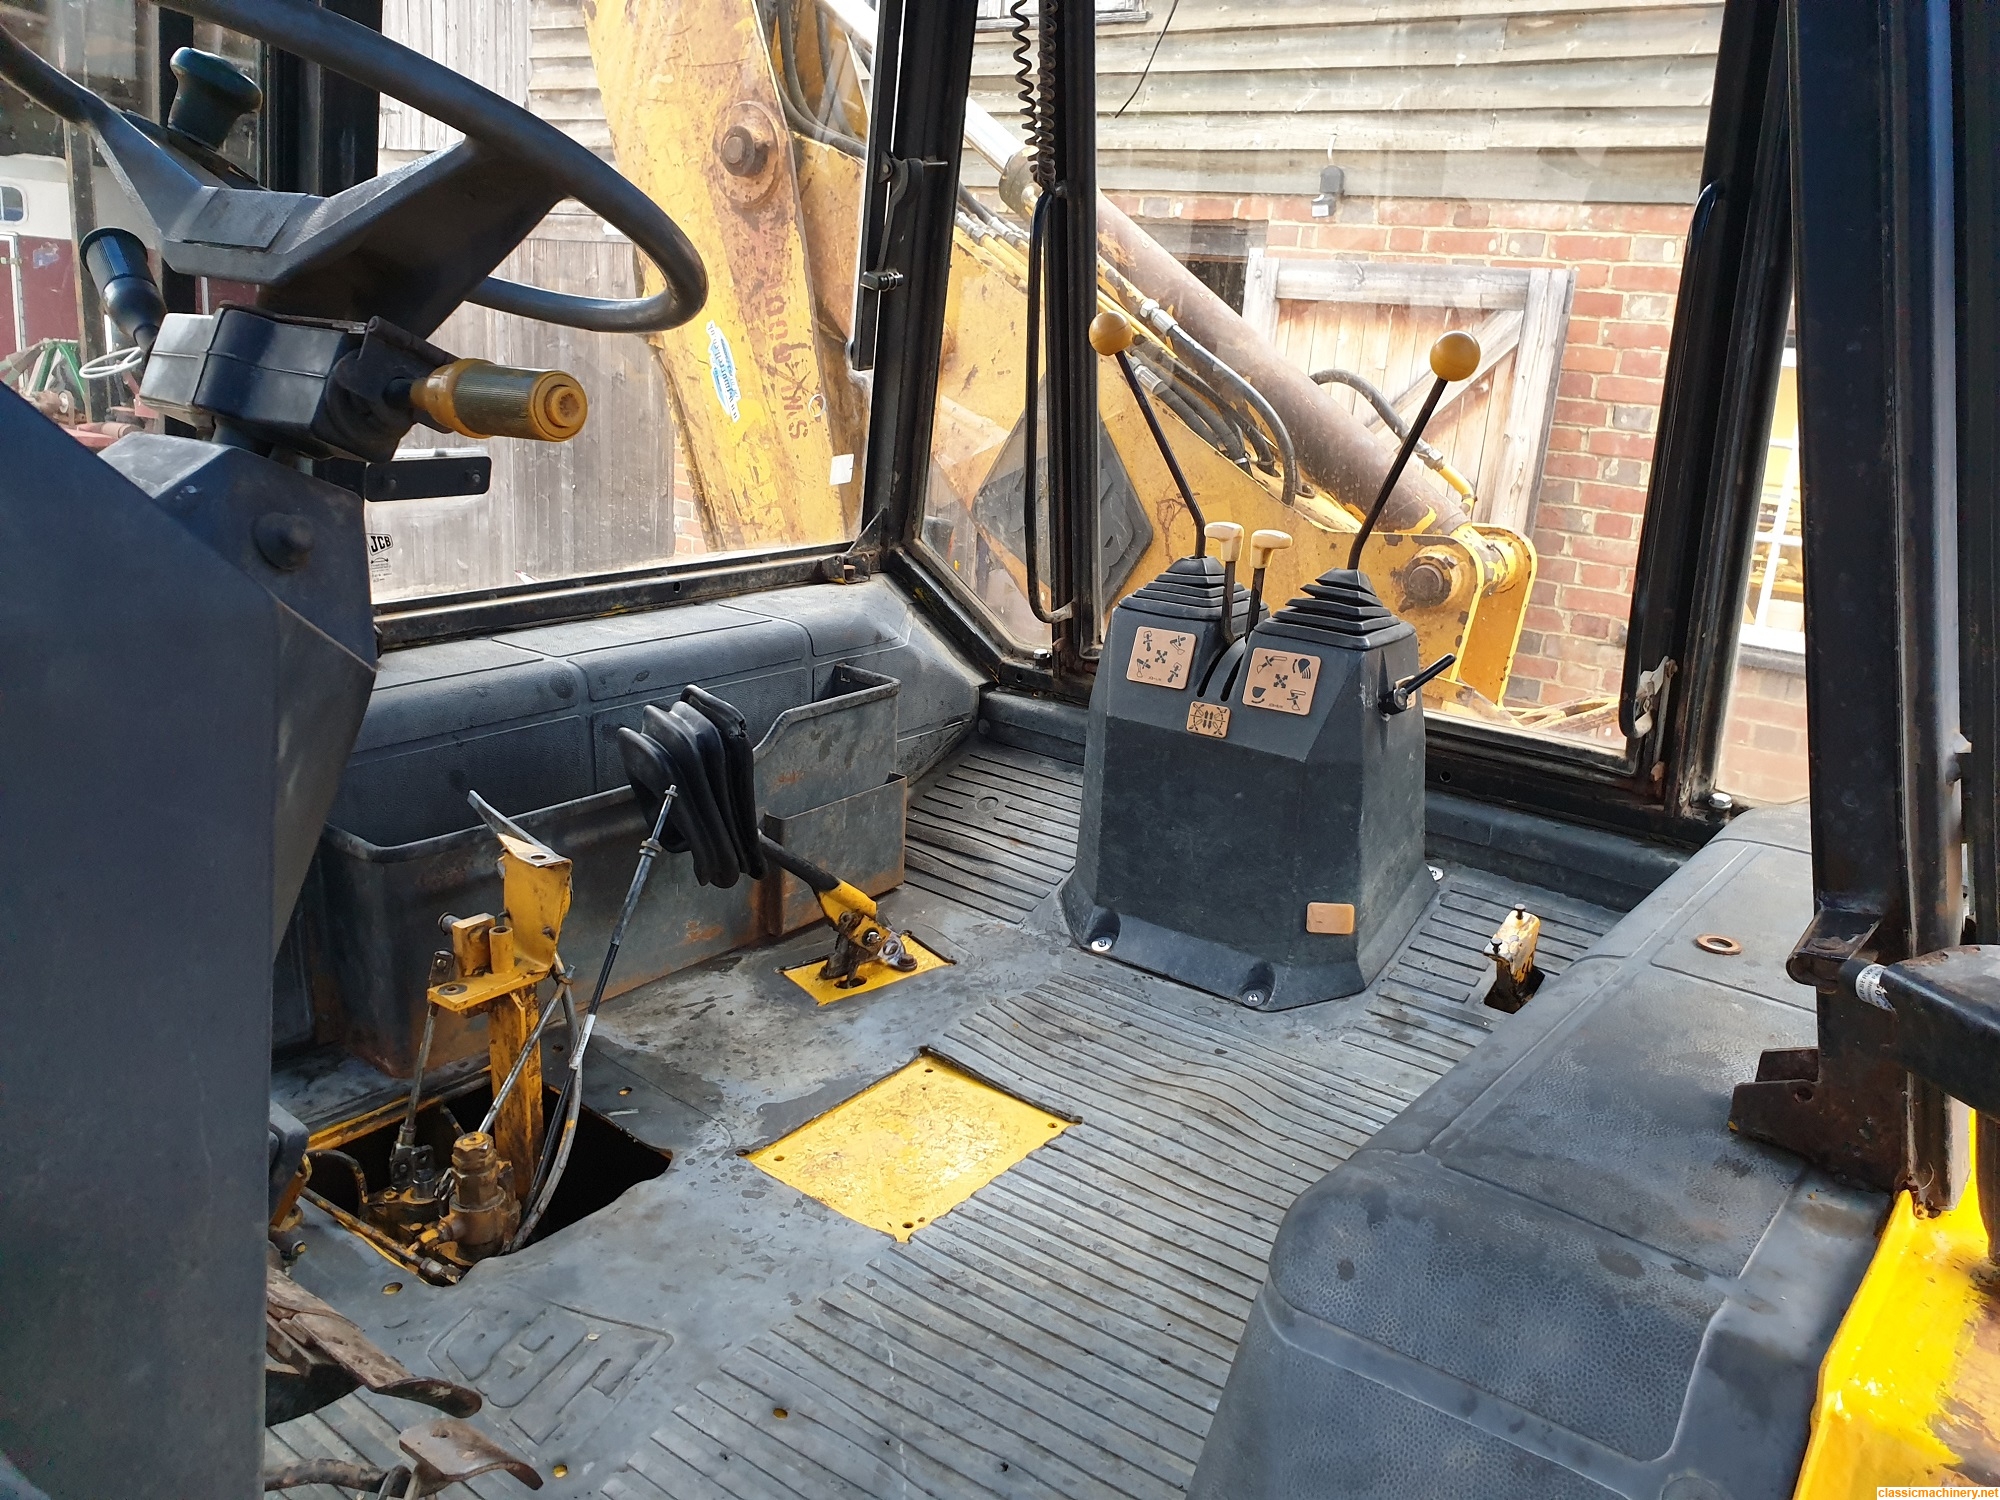
The observant amongst you may have spotted that the cab is now back down on the tub, you may also see where I drilled holes into the cab box sections to feed in the Waxoyl applicator and gave the insides a good coating.
I've also repaired the front loader control console in a similar way to the excavator one:
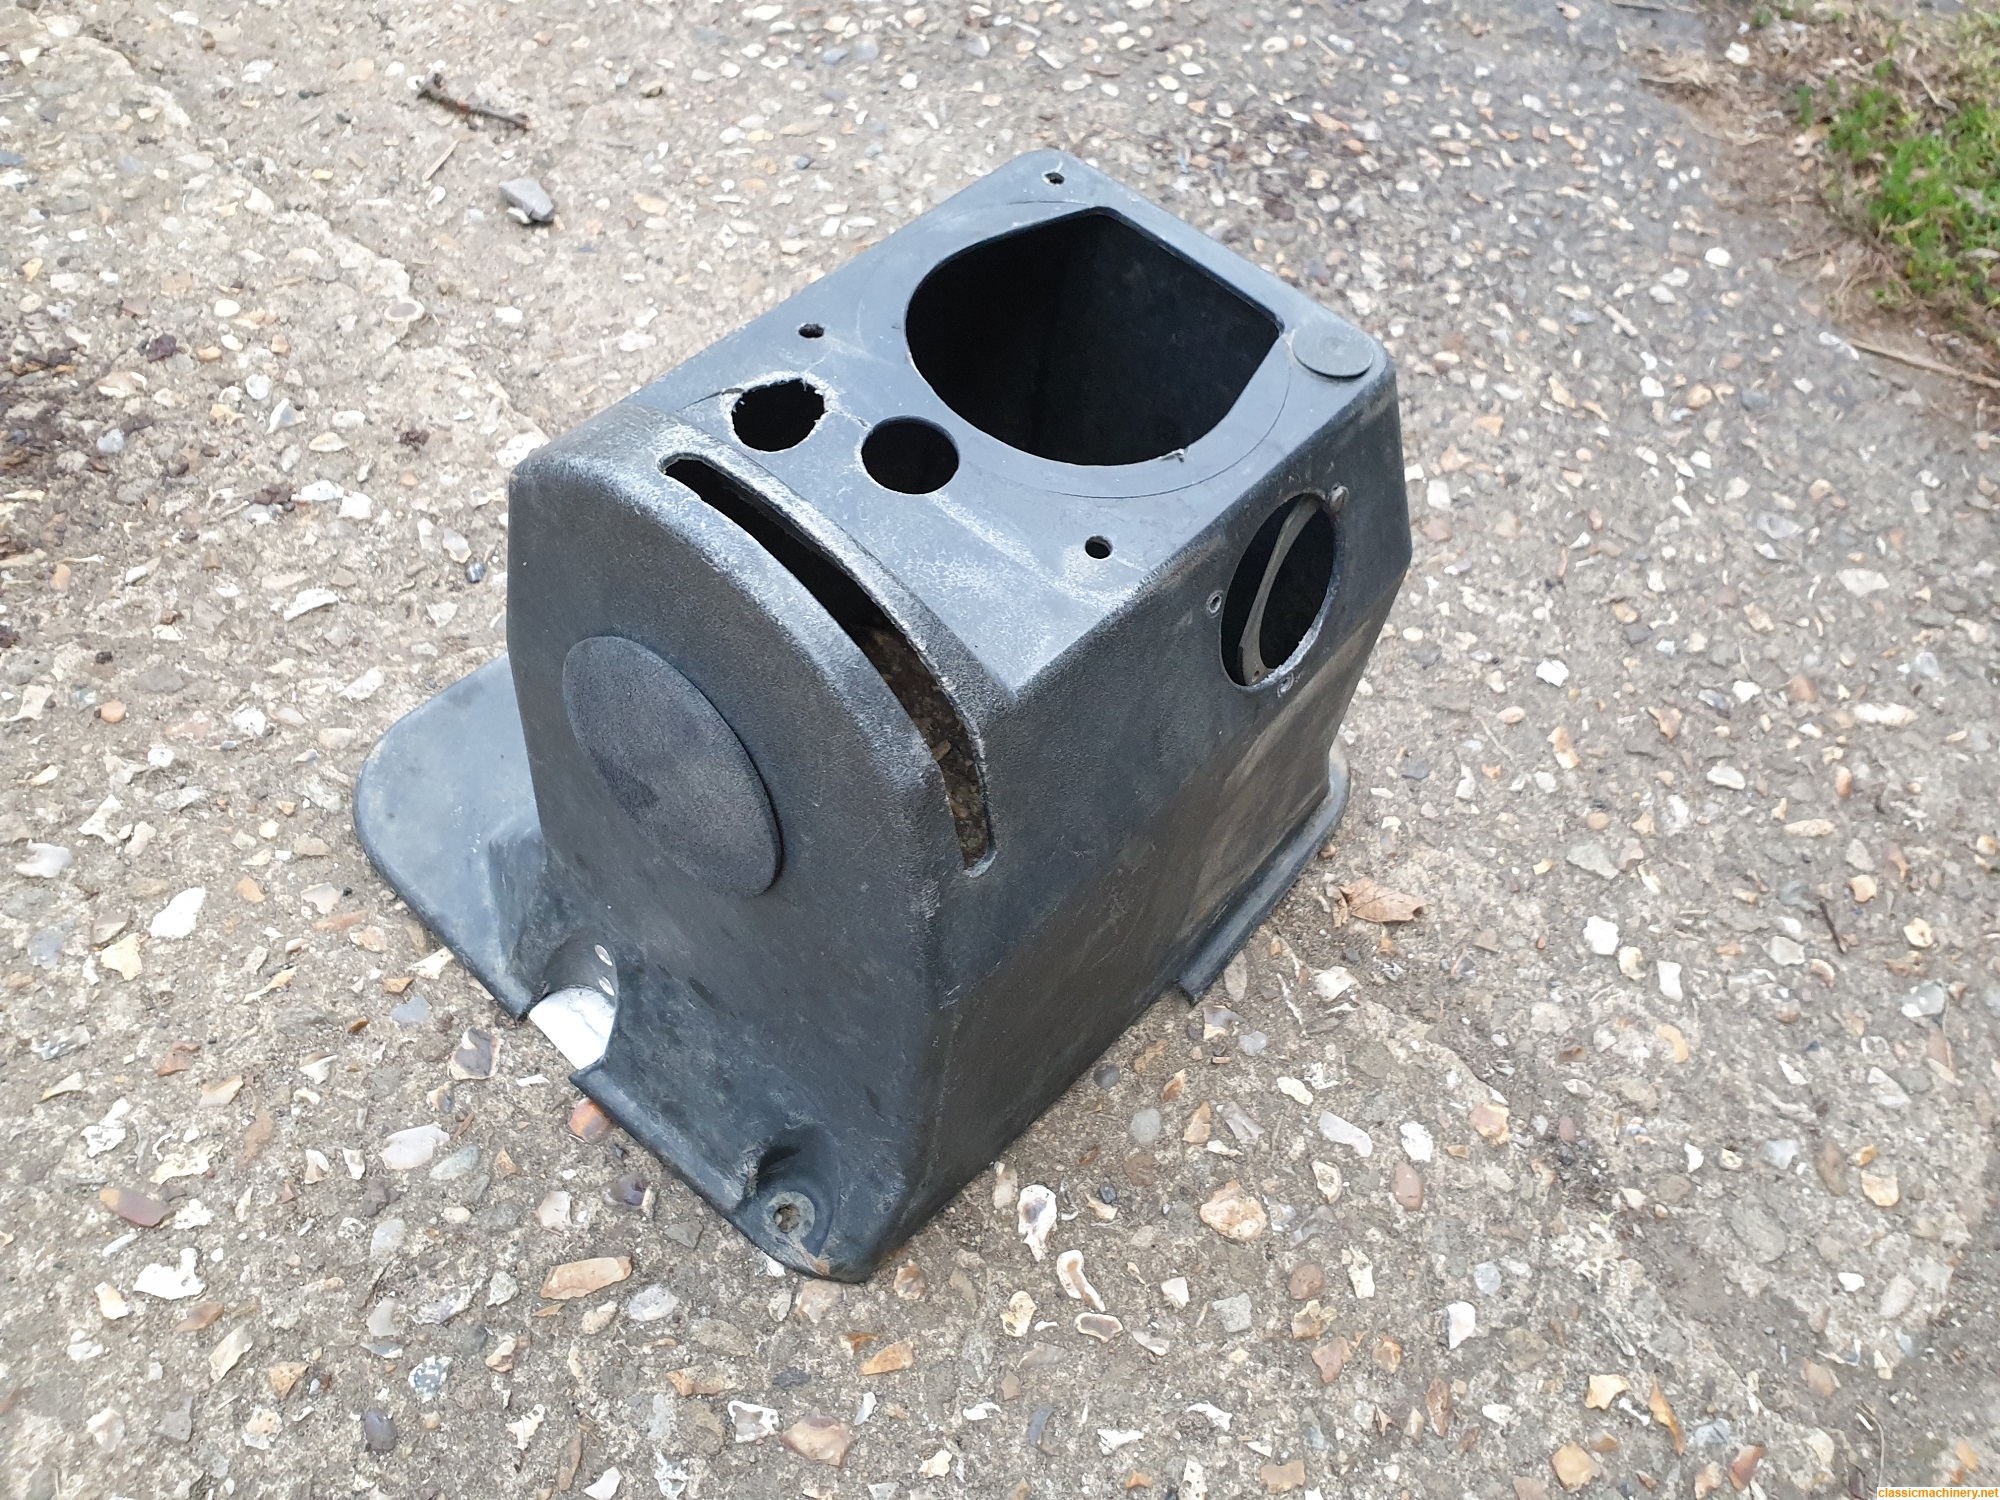
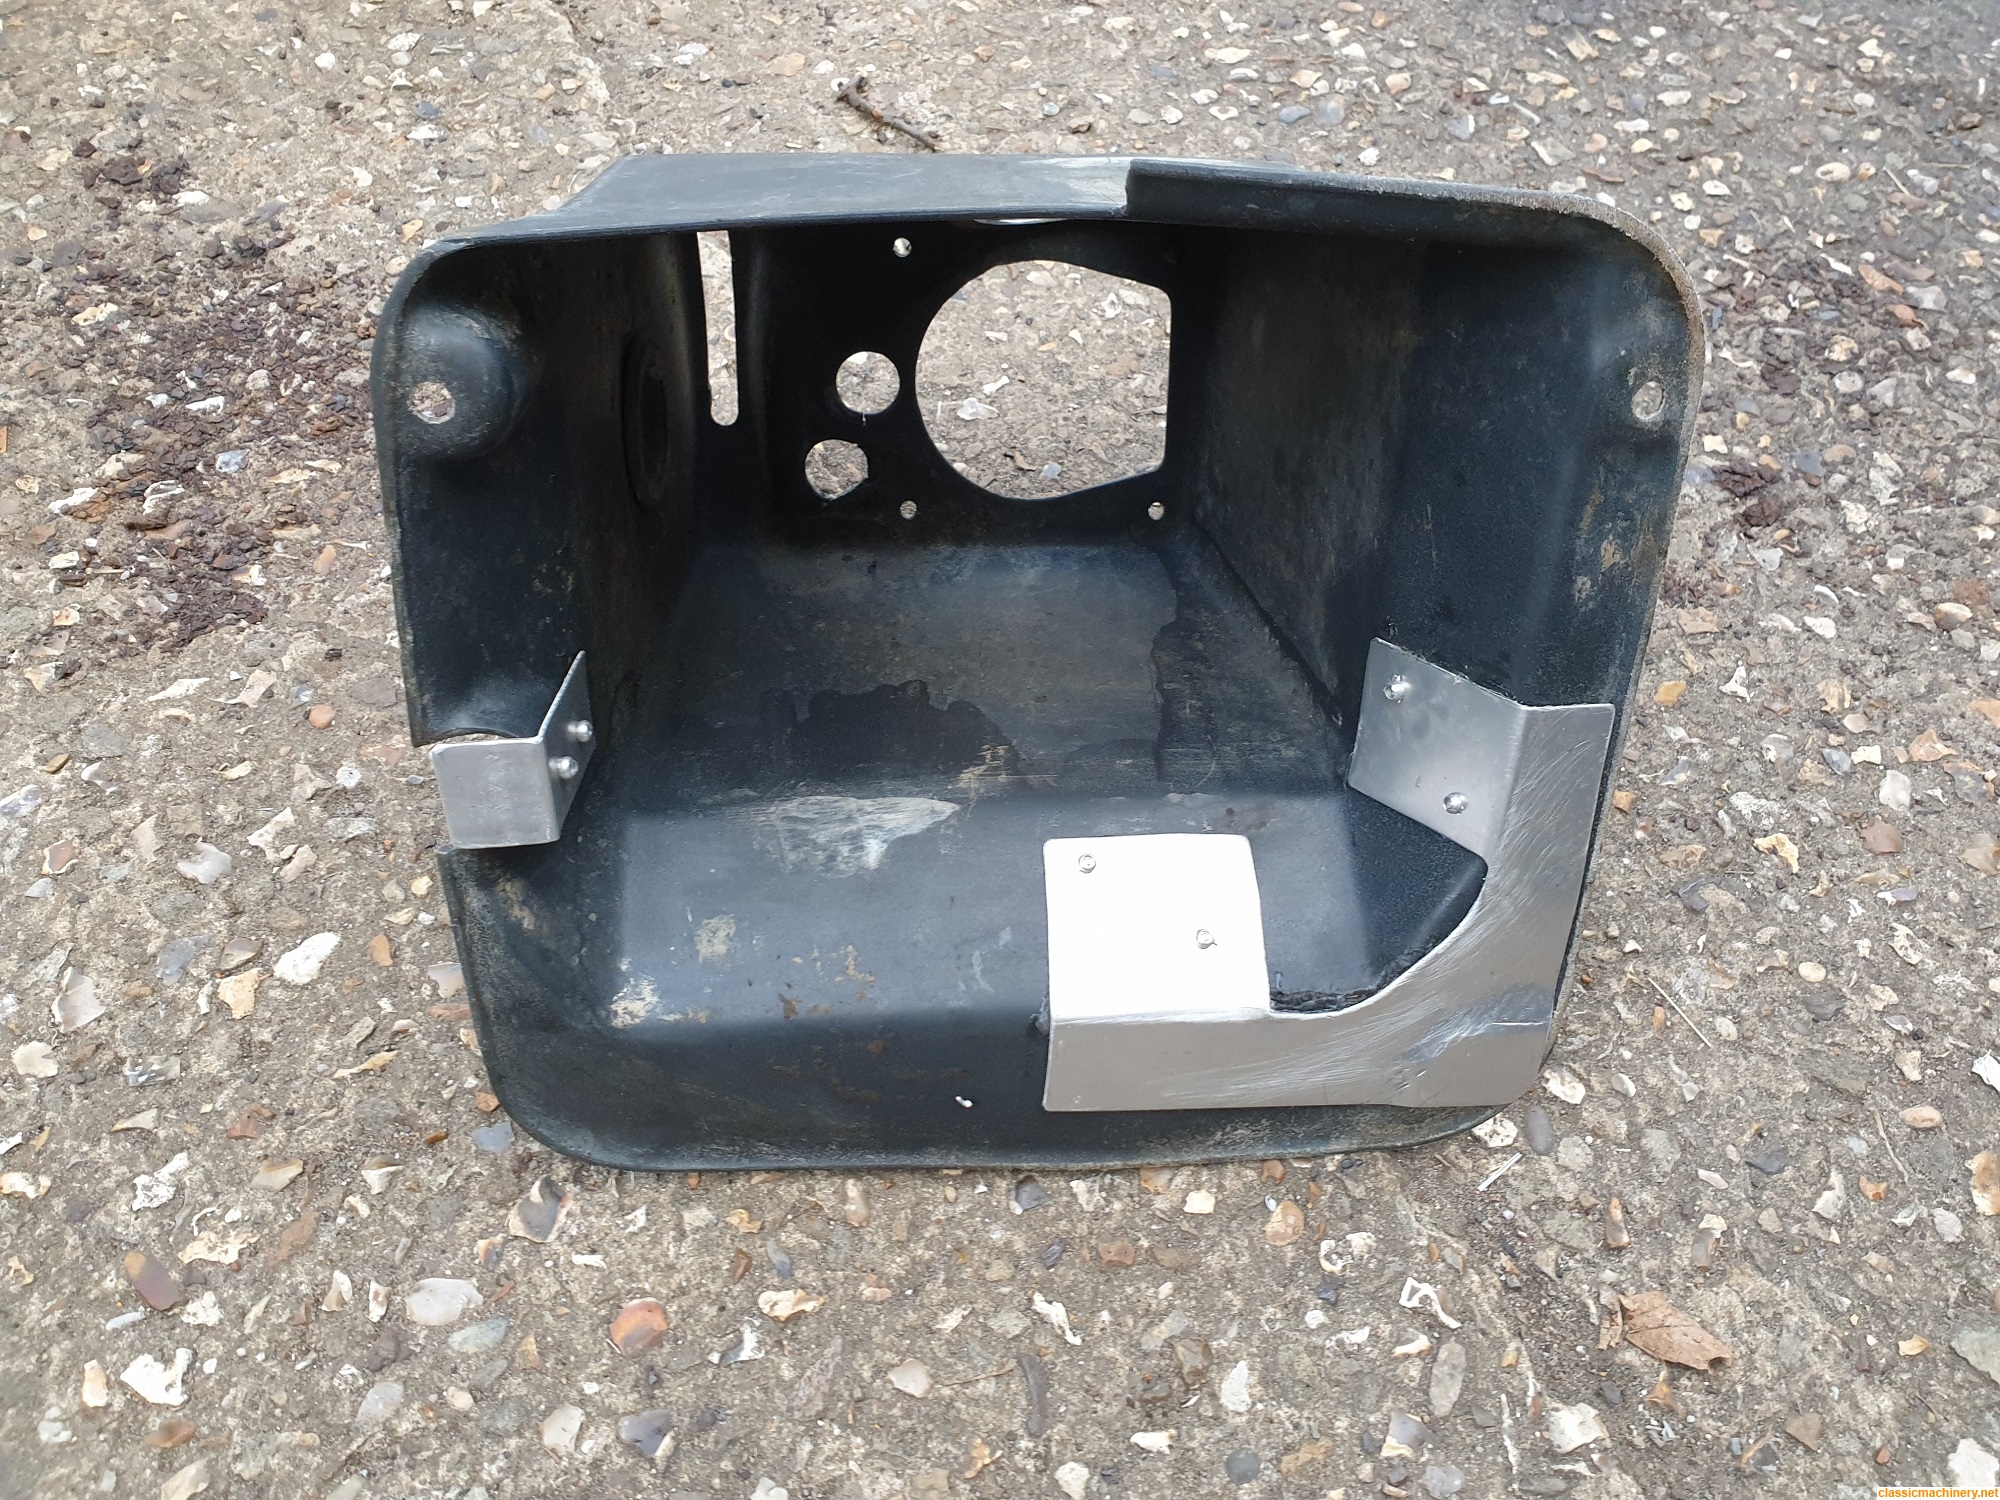
Not all the bits have arrived to repair the linkage for the control levers so the console hasn't been refitted yet. I'm going to have to have a think how I fix it down, as I bought some new plastic rivets with the screw centres that looked similar to the ones I removed, however I've solemnly broken every one that I have tried to fit while trying to secure the gear lever gaiter down, not best pleased about that, the plastic seems to be a little too brittle for the application
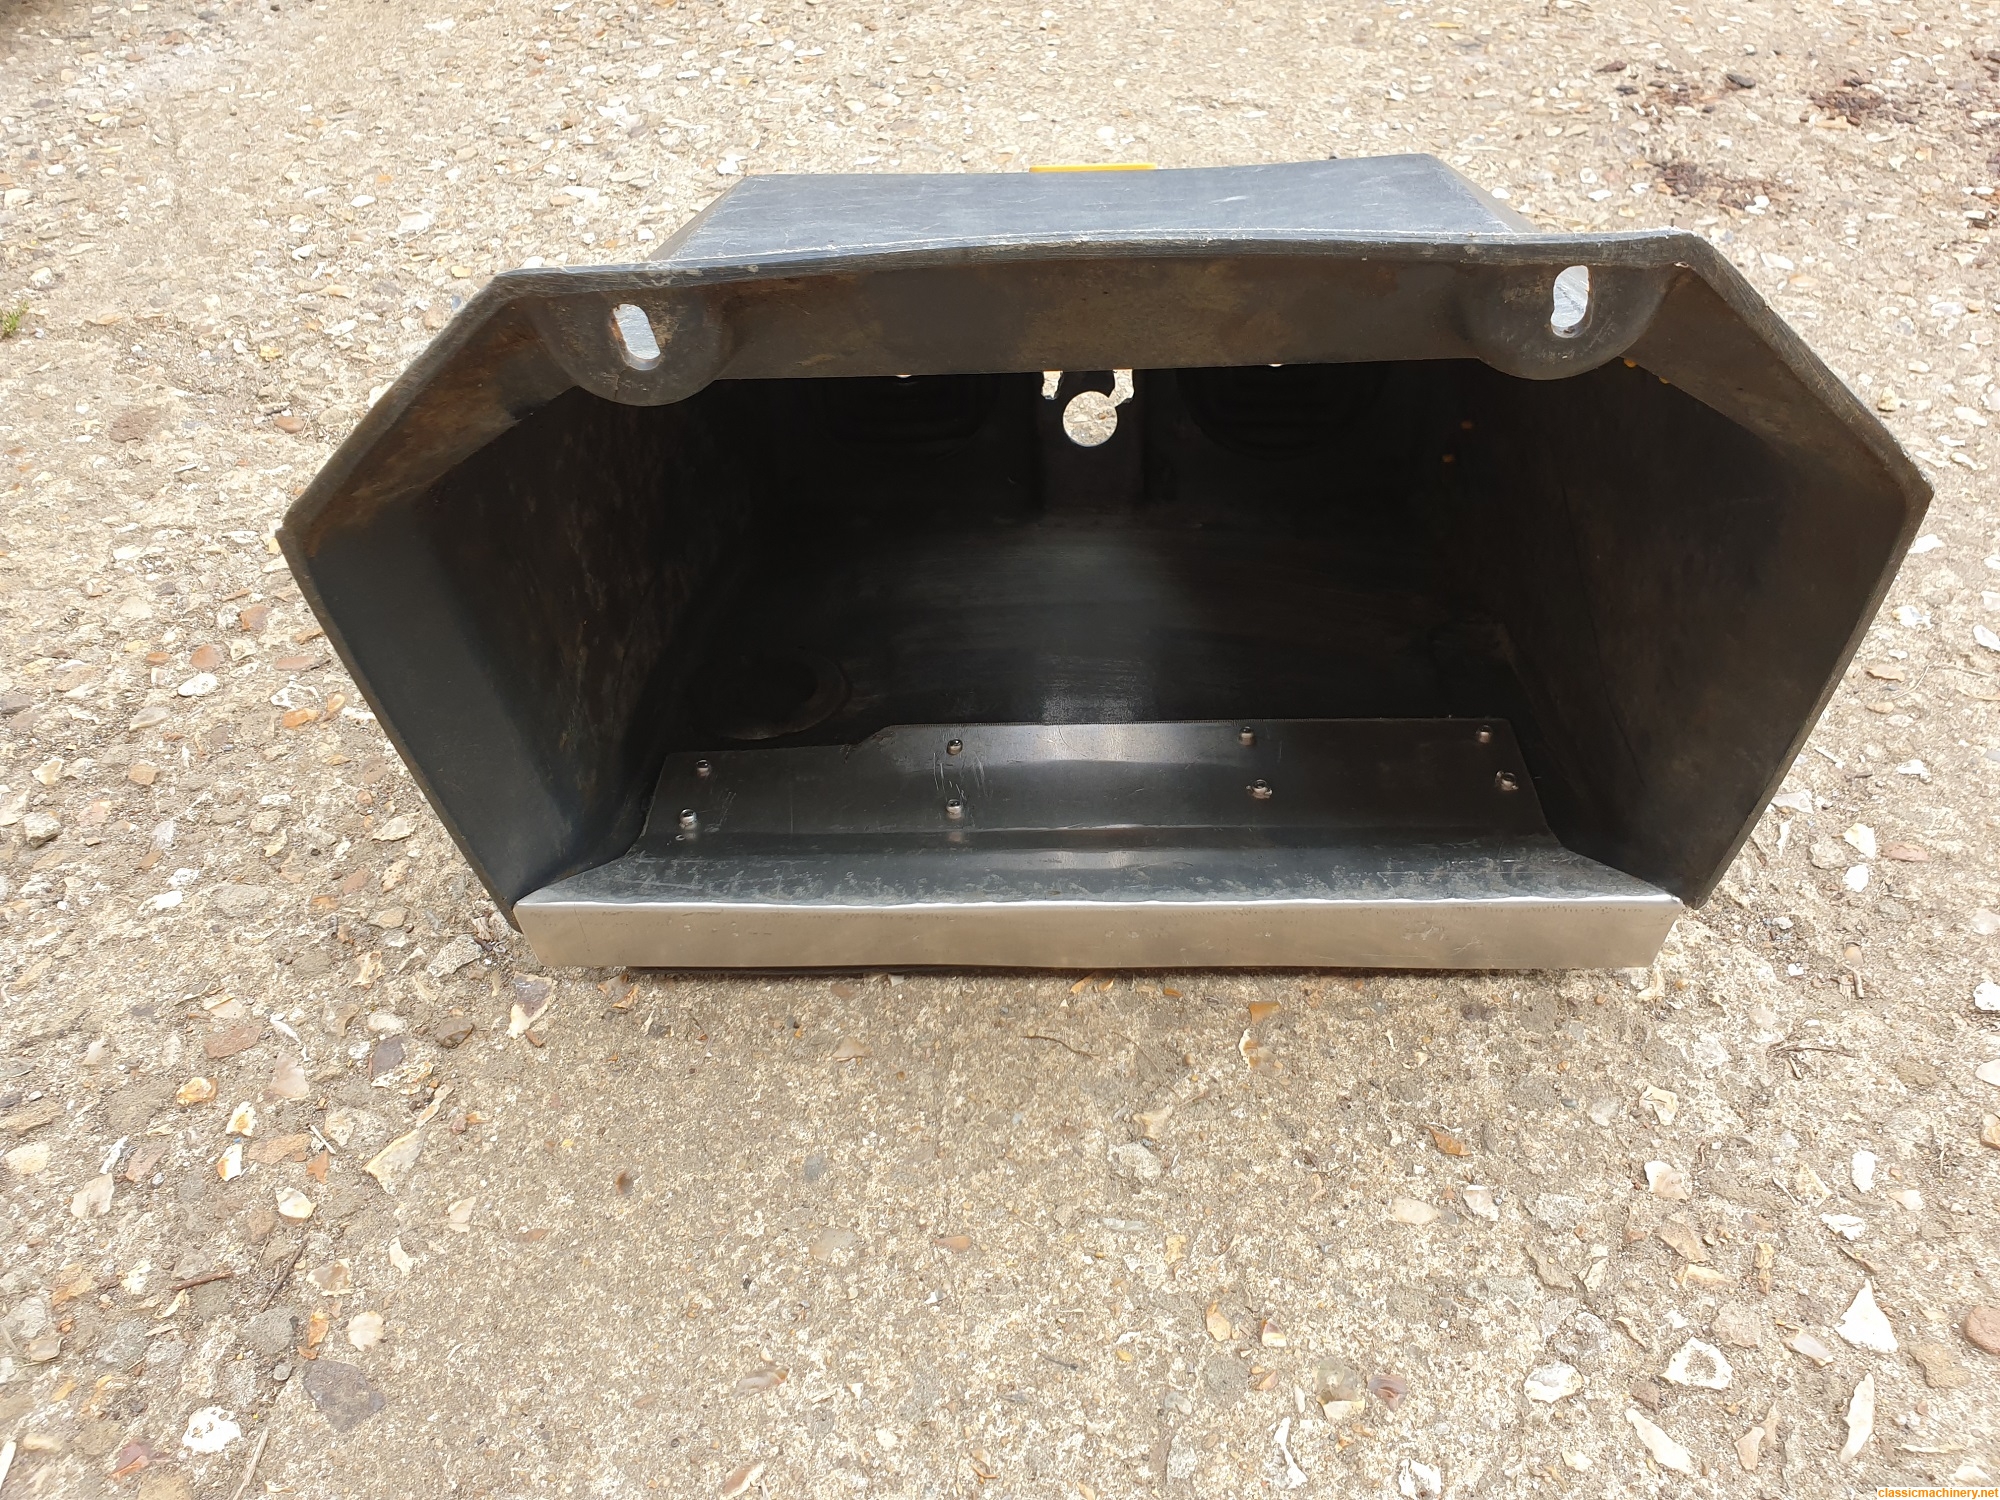
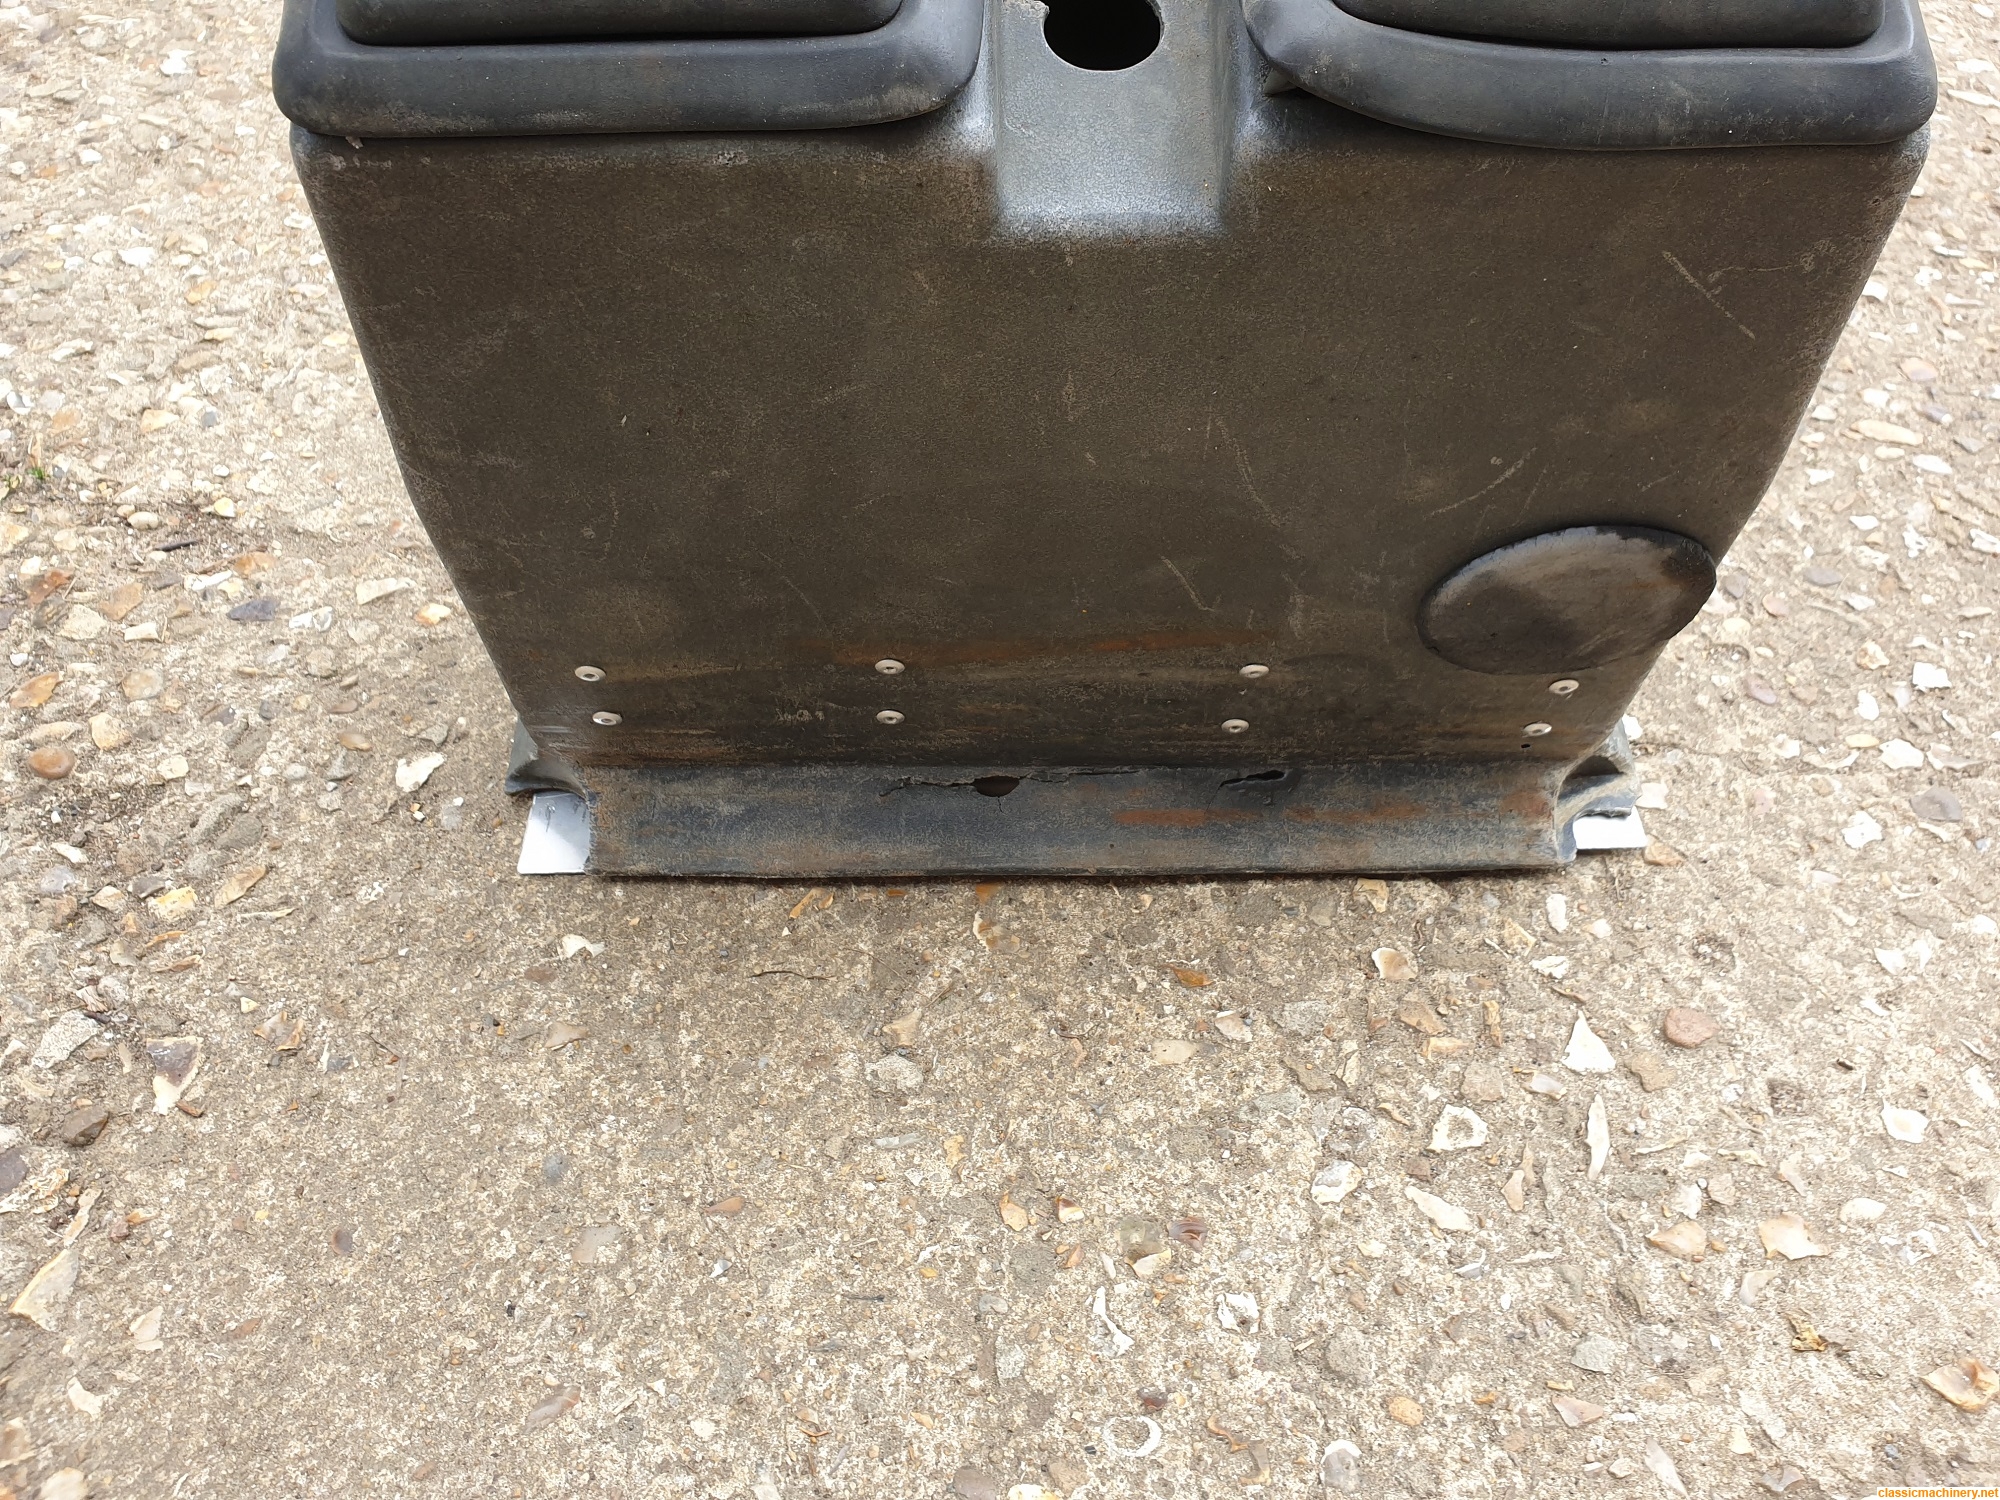
Another thing that is going to need attention is the seat post:

The conical strengthener on the bottom of the post had rotted out where it met the base plate and it was therefore doing nothing. I was going to replace the cone with 4 welded fillets running from the column towards each bolt hole in the base plate. As I currently don't have my MIG here I was going to pop round next door and ask them if they minded doing a little job for me, but having had a quote back from them to make a sacrificial blade for the front bucket I'm not so sure I'll bother. For a strip of 1/2" thick steel, 8' long and 6" deep, with a chamfer on the front edge and 16 x M16 tapped holes they wanted £1000 quid! Stroll on...either their guys are on some insane hourly rate, or they're trying to make it from Tungsten Carbide not mild steel...best I get my MIG away from my ex and down here somehow
And finally, another big shout out to Vicary Plant, one of the bushes that they sent out for my steering slop repair had a casting flaw in the bronze which went right through the wall. They sent me out a replacement which arrived 24 hours later. Then while I was refitting the ram I realised that the wrong pins had been sent for my machine, once again no fuss on replacing them at no charge and no need for me to send back the incorrect ones THey also gave me a quote for a fully refurbished steering Ram of £195 + VAT, which I don't think is that bad, can't afford it right now, but at least I know where I can get one with decent ends and an unmarked shaft. Certainly less hassle than trying to drill out my ends and then turn up some custom bushes.
With the cab tub painted I got my hands on some Waxoyl and a Schutz gun to give the tub floor, the wheelarches, underneath where the cab bolts to the tub and then inside all the box sections of the cab a good coating. With that done I put the matting back in and got to refitting the steering column shroud and excavator arm console.
The back edge of the excavator arm console was missing the tabs for its fixings and what was left of the plastic had gone quite brittle in the sun, so I folded up a piece of 1mm thick aluminium to form a new mounting then using some pop rivets and CT1 adhesive (thought I'd give it a go as my dad and brother-in-law rave about the stuff) fixed it to the console. Seems to have done the trick, and having tapped the holes in the floor of the tub to M6x1 where it fits I've secured it down to the floor. Feels nice and rigid. Got to say the way the hydraulic lock operates is daft, using a piece of crimped on rubber hose to translate a rotation from nearly vertical to horizontal is pretty poor and it simply doesn't feel like it works that well. Maybe it with feel better when the system is pumping fluid round. Anyway, pics:
Repair to the excavator arm control console:
Floor mat, arch covers, bulkhead covers, cubby box, steering column shroud, excavator arm control console and handbrake all refitted:
The observant amongst you may have spotted that the cab is now back down on the tub, you may also see where I drilled holes into the cab box sections to feed in the Waxoyl applicator and gave the insides a good coating.
I've also repaired the front loader control console in a similar way to the excavator one:
Not all the bits have arrived to repair the linkage for the control levers so the console hasn't been refitted yet. I'm going to have to have a think how I fix it down, as I bought some new plastic rivets with the screw centres that looked similar to the ones I removed, however I've solemnly broken every one that I have tried to fit while trying to secure the gear lever gaiter down, not best pleased about that, the plastic seems to be a little too brittle for the application
Another thing that is going to need attention is the seat post:
The conical strengthener on the bottom of the post had rotted out where it met the base plate and it was therefore doing nothing. I was going to replace the cone with 4 welded fillets running from the column towards each bolt hole in the base plate. As I currently don't have my MIG here I was going to pop round next door and ask them if they minded doing a little job for me, but having had a quote back from them to make a sacrificial blade for the front bucket I'm not so sure I'll bother. For a strip of 1/2" thick steel, 8' long and 6" deep, with a chamfer on the front edge and 16 x M16 tapped holes they wanted £1000 quid!
And finally, another big shout out to Vicary Plant, one of the bushes that they sent out for my steering slop repair had a casting flaw in the bronze which went right through the wall. They sent me out a replacement which arrived 24 hours later. Then while I was refitting the ram I realised that the wrong pins had been sent for my machine, once again no fuss on replacing them at no charge and no need for me to send back the incorrect ones
CMN Stuff: MF65, Thwaites Nimline, JCB 3CX
Projects: S11a 88" V8 Hybrid, 2 x S111 109"s, Mk11 Mini, Harrison L5A
Ish projects: T25 Camper, ST675R
Just added: Alpine S5 & Bridgeport Mk2
Sorely Missed: Impreza, E39 M5
Projects: S11a 88" V8 Hybrid, 2 x S111 109"s, Mk11 Mini, Harrison L5A
Ish projects: T25 Camper, ST675R
Just added: Alpine S5 & Bridgeport Mk2
Sorely Missed: Impreza, E39 M5
-
Slooby
Topic author - Posts: 505
- Joined: Wed Aug 19, 2020 10:32 pm
- Real name: Tim
- Has thanked: 191 times
- Been thanked: 117 times
- Flag:
Re: 1987 JCB 3CX Sitemaster 2WD
No piccies from today's efforts as very little has obviously changed.
The cab is now bolted down to the tub
I managed to salvage enough of the original screw-in plastic trim rivets to get the gear lever gaiter fixed down
I've put the boom lock on the right way up having hit my left-thumb and fore-finger many, many times trying to drift out one of the cotter pins
I've fitted a 'new' washer bottle (kindly donated by an Austin Allegro back in the 90's - which is a perfect fit for the original bracket) and pump to replace the brittle and broken original
I've adjusted the lower left-hand door hinge, where it fixes through the glass the to the inside handle so that the door now clears the wheel arch better. But it, and the left-hand window, still need raising on the lower hinge post to get them to sit correctly and I cannot seem to get the pin to slide up in the mounting blocks to allow me to re-shim them both up a few mm.
We did some ringing around a couple of other steel fabricators locally for alternate quotes for the front bucket wear blade, immediately halving the price we had been quoted by next door Then one place said; 'would you like a price for it made in Hardox?' ooer misses... it is apparently far better suited to the job, and having looked up the material Hardox and https://www.hardoxwearparts.com/ I can see why. Hopefully the price isn't going to be too mad.
Annoyingly the bushes, rod ends, and clevis pins that I ordered to repair the front loader lever mechanism, from a bearings specialist, still haven't arrived, over a week since placing the order.
I've also asked a couple of mates, who live at either end of the street where my former home in North Hampshire is, if they wouldn't mind braving the maelstrom that is dealing with my ex-wife to recover as many of my tools as they can load into a 109 Land Rover/T25 Camper and bring them down to me in Kent. I'm currently not well enough to deal with her face to face so I have to rely on the goodwill, and thicker skin, of others for such things. With any luck that would mean I would finally have my much better selection of tools on hand, and most importantly my MIG welder!
The cab is now bolted down to the tub
I managed to salvage enough of the original screw-in plastic trim rivets to get the gear lever gaiter fixed down
I've put the boom lock on the right way up having hit my left-thumb and fore-finger many, many times trying to drift out one of the cotter pins
I've fitted a 'new' washer bottle (kindly donated by an Austin Allegro back in the 90's - which is a perfect fit for the original bracket) and pump to replace the brittle and broken original
I've adjusted the lower left-hand door hinge, where it fixes through the glass the to the inside handle so that the door now clears the wheel arch better. But it, and the left-hand window, still need raising on the lower hinge post to get them to sit correctly and I cannot seem to get the pin to slide up in the mounting blocks to allow me to re-shim them both up a few mm.
We did some ringing around a couple of other steel fabricators locally for alternate quotes for the front bucket wear blade, immediately halving the price we had been quoted by next door
Annoyingly the bushes, rod ends, and clevis pins that I ordered to repair the front loader lever mechanism, from a bearings specialist, still haven't arrived, over a week since placing the order.
I've also asked a couple of mates, who live at either end of the street where my former home in North Hampshire is, if they wouldn't mind braving the maelstrom that is dealing with my ex-wife to recover as many of my tools as they can load into a 109 Land Rover/T25 Camper and bring them down to me in Kent. I'm currently not well enough to deal with her face to face so I have to rely on the goodwill, and thicker skin, of others for such things. With any luck that would mean I would finally have my much better selection of tools on hand, and most importantly my MIG welder!
CMN Stuff: MF65, Thwaites Nimline, JCB 3CX
Projects: S11a 88" V8 Hybrid, 2 x S111 109"s, Mk11 Mini, Harrison L5A
Ish projects: T25 Camper, ST675R
Just added: Alpine S5 & Bridgeport Mk2
Sorely Missed: Impreza, E39 M5
Projects: S11a 88" V8 Hybrid, 2 x S111 109"s, Mk11 Mini, Harrison L5A
Ish projects: T25 Camper, ST675R
Just added: Alpine S5 & Bridgeport Mk2
Sorely Missed: Impreza, E39 M5
-
justamin
- Posts: 13
- Joined: Sun Aug 03, 2014 11:30 pm
- Real name: Ashley Culling
- Has thanked: 1 time
- Been thanked: 5 times
- Flag:
- Contact:
Re: 1987 JCB 3CX Sitemaster 2WD
Enjoying this thread as I'm currently trying to rebuild my own 1981 3CX. But I purchased one of these for the front bucket - https://www.ebay.co.uk/itm/Weld-On-Cutt ... 2749.l2649
-
Slooby
Topic author - Posts: 505
- Joined: Wed Aug 19, 2020 10:32 pm
- Real name: Tim
- Has thanked: 191 times
- Been thanked: 117 times
- Flag:
Re: 1987 JCB 3CX Sitemaster 2WD
Cheers Ashley
Got the quote back for the Hardox (450 grade) blade 110mm deep by 12mm thick with a single row of 9 M16 threaded through holes and it's about the same as having one made in EN3B 150mm deep 12mm thick but with two rows of threaded holes. In both cases they have a chamfered edge on both long sides, so when one wears you simply unbolt and flip it round doubling tge useful life. That was one reason I wanted to go bolt on rather than weld, the other being I'm not convinced my 180amp single phase MIG is pokey enough to weld such thick steel, or if it is the sockets I'll be hooking up to (13Amp) may not be up to it!
It's a moot point anyway as my ex has decided to throw in a load of unacceptable 'conditions' that have to be met for me to collect anything from the house of mine. I fear I will be having to get legal on her to get her to understand she cannot act like this, and that just drags things out as well as costing a chunk of change I'd rather throw at the JCB!
Anyway, rant over
I managed to get some welding help from next door after all and the seat post is now braced up with 1/2"(!) Plate, not on the diagnols towards the bolt holes on tge base plate as I would've done it myself, but it'll be strong enough! Had a good chat with them about the mad price they quoted for the blade, turned out they asked a firm my family use for their stainless folding to give them a price to machine the edges on, that firm thought they were trying to poach business so gave him a daft price! So might be able to get it done cheaper after all!
Once I've taken some more pics I'll do a more thorough update...meanwhile I need to find a 1 3/4" / 44mm socket, I already have one but it's been impounded like the rest of my tools....grrrrrr
CMN Stuff: MF65, Thwaites Nimline, JCB 3CX
Projects: S11a 88" V8 Hybrid, 2 x S111 109"s, Mk11 Mini, Harrison L5A
Ish projects: T25 Camper, ST675R
Just added: Alpine S5 & Bridgeport Mk2
Sorely Missed: Impreza, E39 M5
Projects: S11a 88" V8 Hybrid, 2 x S111 109"s, Mk11 Mini, Harrison L5A
Ish projects: T25 Camper, ST675R
Just added: Alpine S5 & Bridgeport Mk2
Sorely Missed: Impreza, E39 M5
-
gecko.cx
- Posts: 309
- Joined: Thu Jul 04, 2019 11:44 am
- Real name: ian
- Has thanked: 126 times
- Been thanked: 114 times
- Flag:
Re: 1987 JCB 3CX Sitemaster 2WD
Keep a look-out for a grader blade (new or used)
As for your quote, it'd be a lot of machine time to mill an edge, but quick to flame or plasma cut it. Make sure they understand it's a wear part and not some architectural decoration.
Just an example
https://www.ebay.co.uk/itm/Weld-On-Cutting-Edge-Bucket-Wear-Strip-Standard-Single-Bevel/152731765898
-
Slooby
Topic author - Posts: 505
- Joined: Wed Aug 19, 2020 10:32 pm
- Real name: Tim
- Has thanked: 191 times
- Been thanked: 117 times
- Flag:
Re: 1987 JCB 3CX Sitemaster 2WD
Yup, we had been discussing that very thing (that's the same ebay item as Ashley linked to btw  ). The quotes were based on flame/plasma cut chamfers and were coming in at £400+vat, an off the shelf 3m length of 150mm wide 12mm thick EN3B seems to be around the £200+vat mark, so a further £200 to chamfer both sides the mark up, drill and tap 18 holes seems in the ballpark and suggests to be that the Hardox 450 material cost is around £300 as it only has 9 holes to drill and tap. As Hardox is a high chrome steel alloy it keeps its edge longer, doesn't suffer the carbon burn off when being flame/plasma cut and by all accounts gets about 3 times the life of carbon steel blades.
One of the benefits of going next door is that there is a bit of barter to be had as we recently sunk £600 into their digger, plus they have a rotabroach and could far more easily drill the mounting holes in the bucket. Just have to see how much Hardox, or an equivalent would cost them to buy.
One of the benefits of going next door is that there is a bit of barter to be had as we recently sunk £600 into their digger, plus they have a rotabroach and could far more easily drill the mounting holes in the bucket. Just have to see how much Hardox, or an equivalent would cost them to buy.
CMN Stuff: MF65, Thwaites Nimline, JCB 3CX
Projects: S11a 88" V8 Hybrid, 2 x S111 109"s, Mk11 Mini, Harrison L5A
Ish projects: T25 Camper, ST675R
Just added: Alpine S5 & Bridgeport Mk2
Sorely Missed: Impreza, E39 M5
Projects: S11a 88" V8 Hybrid, 2 x S111 109"s, Mk11 Mini, Harrison L5A
Ish projects: T25 Camper, ST675R
Just added: Alpine S5 & Bridgeport Mk2
Sorely Missed: Impreza, E39 M5
-
Slooby
Topic author - Posts: 505
- Joined: Wed Aug 19, 2020 10:32 pm
- Real name: Tim
- Has thanked: 191 times
- Been thanked: 117 times
- Flag:
Re: 1987 JCB 3CX Sitemaster 2WD
I'm beginning to think I might not need a 44mm socket to remove and tighten back up the output shaft socket...it's meant to be torqued to 1.5lbft apparently...that's not exactly 3/4" drive breaker bar/torque wrench teritory, more 'finger tight' to me
CMN Stuff: MF65, Thwaites Nimline, JCB 3CX
Projects: S11a 88" V8 Hybrid, 2 x S111 109"s, Mk11 Mini, Harrison L5A
Ish projects: T25 Camper, ST675R
Just added: Alpine S5 & Bridgeport Mk2
Sorely Missed: Impreza, E39 M5
Projects: S11a 88" V8 Hybrid, 2 x S111 109"s, Mk11 Mini, Harrison L5A
Ish projects: T25 Camper, ST675R
Just added: Alpine S5 & Bridgeport Mk2
Sorely Missed: Impreza, E39 M5
Who is online
Users browsing this forum: No registered users and 41 guests